이전 예제 코드를 실행한후 웹브라우저에서 아래 링크로 들어가봅시다.
http://127.0.0.1:8080/actuator/metrics/http.server.requests
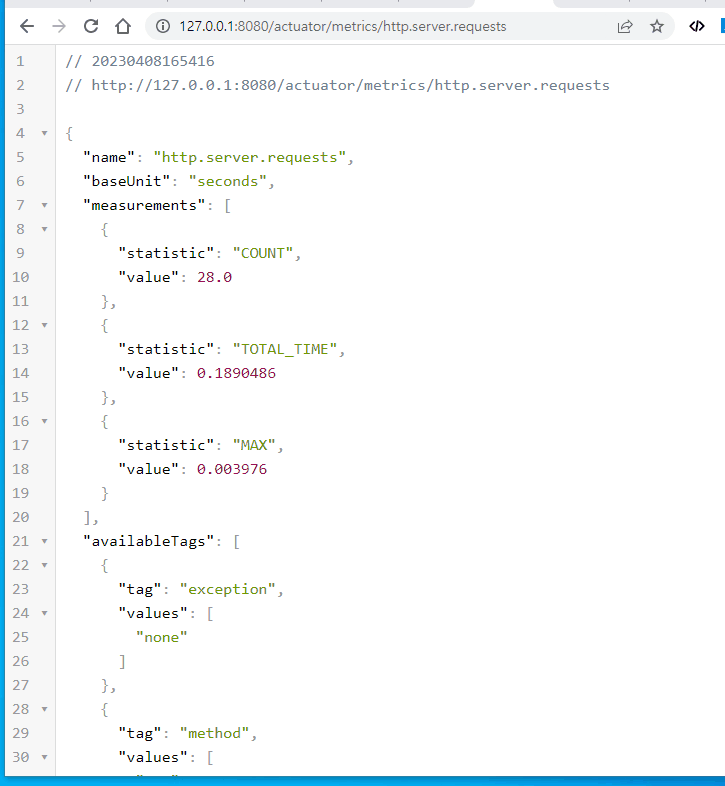
availableTags 라는 필드가 보이고 이걸 보니 hash tag 같은 느낌이 듭니다. 즉 필터링해서 특정 케이스에 대한 것만 볼 수 있을것 같습니다.
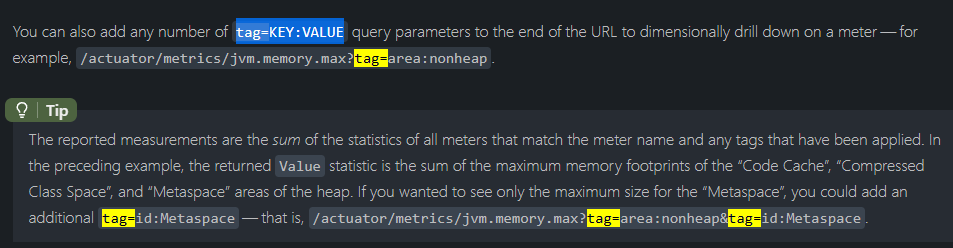
위와 같이 쿼리 스트링에 tag=KEY:VALUE 형식으로 넣으라고 가이드 되어 있습니다. 만약 여러값을 필터링 하고 싶으면 tag=KEY1:VALUE1&tag=KEY2:VALUE2 처럼 이어서 넣으면 됩니다.
http://127.0.0.1:8080/actuator/metrics/http.server.requests 에 대해서도 위 방법으로 필터링을 해보면 아래처럼 잘 동작하는걸 알 수 있습니다.
이제 우리도 위와 같이 tag 를 넣어서 필터링 되도록 custom metric 을 만들어봅시다.
app 내부적으로 queue 를 생성했다고 가정하고, 이 queue 에 push 한 횟수와 pop 한 횟수를 구하는 counter 를 등록하면 아래와 같습니다.
총 2개의 counter 가 생성되며, 이 둘은 myQueueCounter 라는 이름으로 그룹핑 되고, tag 가 서로 다르므로 tag 을 통해 각각 조회가 가능합니다.
@Service
@RequiredArgsConstructor
public class MyQueueManagerWithTags {

    private final MeterRegistry meterRegistry;  // 생성자 주입

    public void push() {
        Counter.builder("myQueueCounter")
                .tag("type", "push")   <-- key value 순
                .register(meterRegistry)
                .increment();
    }

    public void pop() {
        Counter.builder("myQueueCounter")
                .tag("type", "pop")    <-- key value 순
                .register(meterRegistry)
                .increment();
    }
}
테스트를 위해 rest controller 에 아래처럼 위에서 만든 bean을 주입받고, push()와 pop()을 호출하도록 해줍니다.
private final MyQueueManagerWithTags myQueueManagerWithTags;
@GetMapping("/push")
public String push() {
myQueueManagerWithTags.push();
return "ok";
}
@GetMapping("/pop")
public String pop() {
myQueueManagerWithTags.pop();
return "ok";
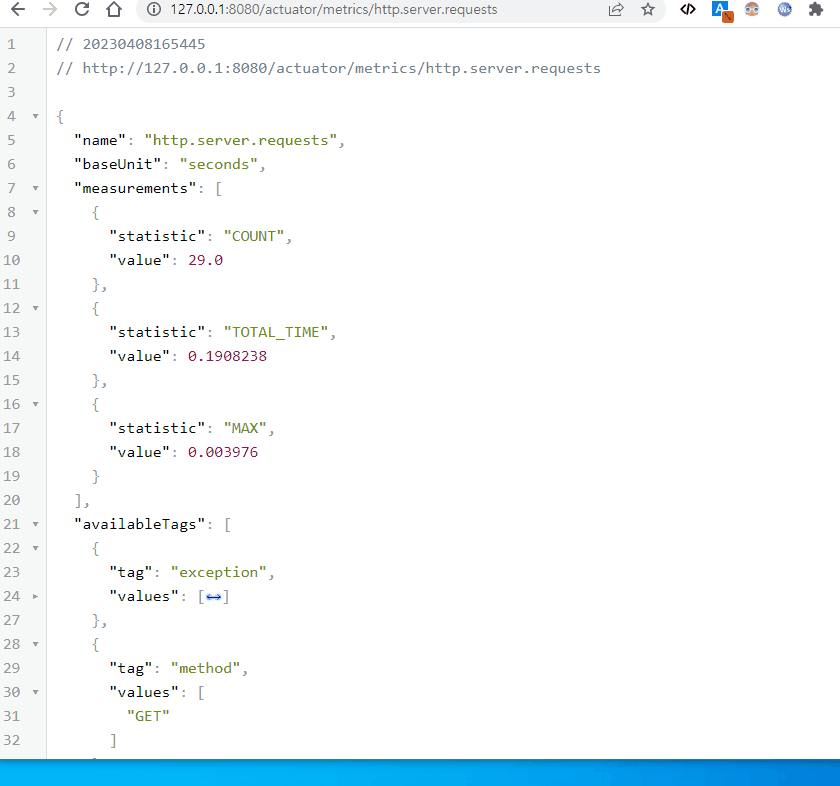
}이후 아래처럼 위 rest api를 호출한후 actuator 에서 값을 보면 tag 들이 나오며, tag를 통해 필터링된 값들을 확인할 수 있습니다.

마지막으로 @Counted 라는 어노테이션에도 tag 를 넣어봅시다.
@Counted 는 아래처럼 기본제공되는 tag 들이 있습니다.
이것외에 추가로 넣어보겠습니다.
아래처럼 @Counted 어노테이션을 살펴보니 예상대로 tag 관련 필드가 있으며, 설명을 보니 배열로 값을 넣되 key, value 순으로 넣어야 한다고 합니다. 따라서 무조건 짝수개로 값이 들어가야겠죠?

아래처럼 2개 rest api 에 @Counted 를 적용했고, extraTags 값만 다르게 설정했습니다.
@Counted(value="myCountedAnnotationCount", extraTags = {"type", "test1"})
@GetMapping("/counted")
public String counted() {
return "ok";
}
@Counted(value="myCountedAnnotationCount", extraTags = {"type", "test2"})
@GetMapping("/counted2")
public String counted2() {
return "ok";
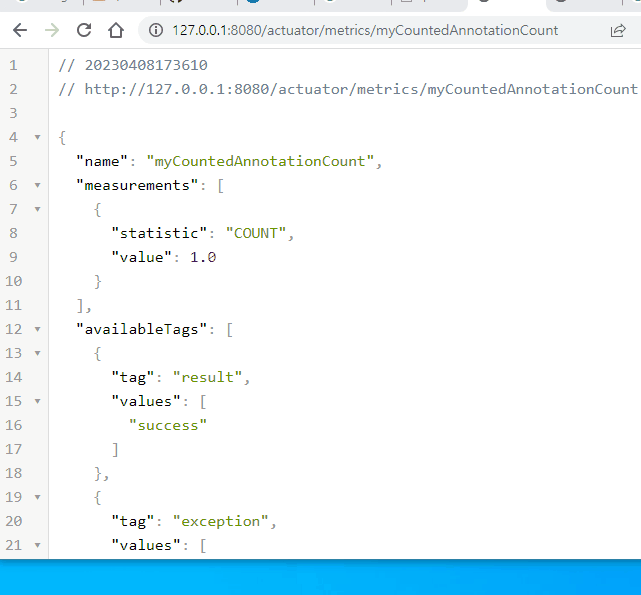
}이후 위 rest api 를 1회 이상 호출되도록 한후 아래처럼 브라우저에서 tag 가 잘 동작하는걸 알 수 있습니다.

Counter 를 meterRegistry에 등록시 tag 값이 다르면 다른 Counter 로 등록된다는것. 그리고 Counter name 을 통해 그룹핑되고 tag 를 통해 필터링할 수 있다는 것을 꼭 기억하도록 합시다.
그리고 다음 포스팅부터 다룰 Gauge, Timer 등에도 tag 는 동일한 의미로 사용됩니다. 예제를 간단히 하기 위해 tag 는 이번 포스팅에서만 사용하며, 그외 포스팅에서는 tag 생략하고 진행하니 참고하세요.
사용된 소스코드는 아래에서 확인할 수 있습니다.
https://github.com/ChunGeun-Yu/spring-actuator-study/tree/metricsTags
spring boot actuator 시리즈가 꽤나 길죠? 힘드시겠지만 조금만 더 해보세요. 거의 다 왔습니다.